 VibeCode
Getting started
This guide takes you from nothing to a first working result. It takes about ten minutes. You need a computer with macOS, Windows or Linux, and either an API key from a model provider or a local model.
1. Install the app
Open a terminal and paste the command for your system. It downloads the app and puts it with your other applications.
curl -fsSL https://vibecode.surf/install.sh | shirm https://vibecode.surf/install.ps1 | iex2. Sign in
Open the app. The first screen asks you to sign in. You do this once on each computer.
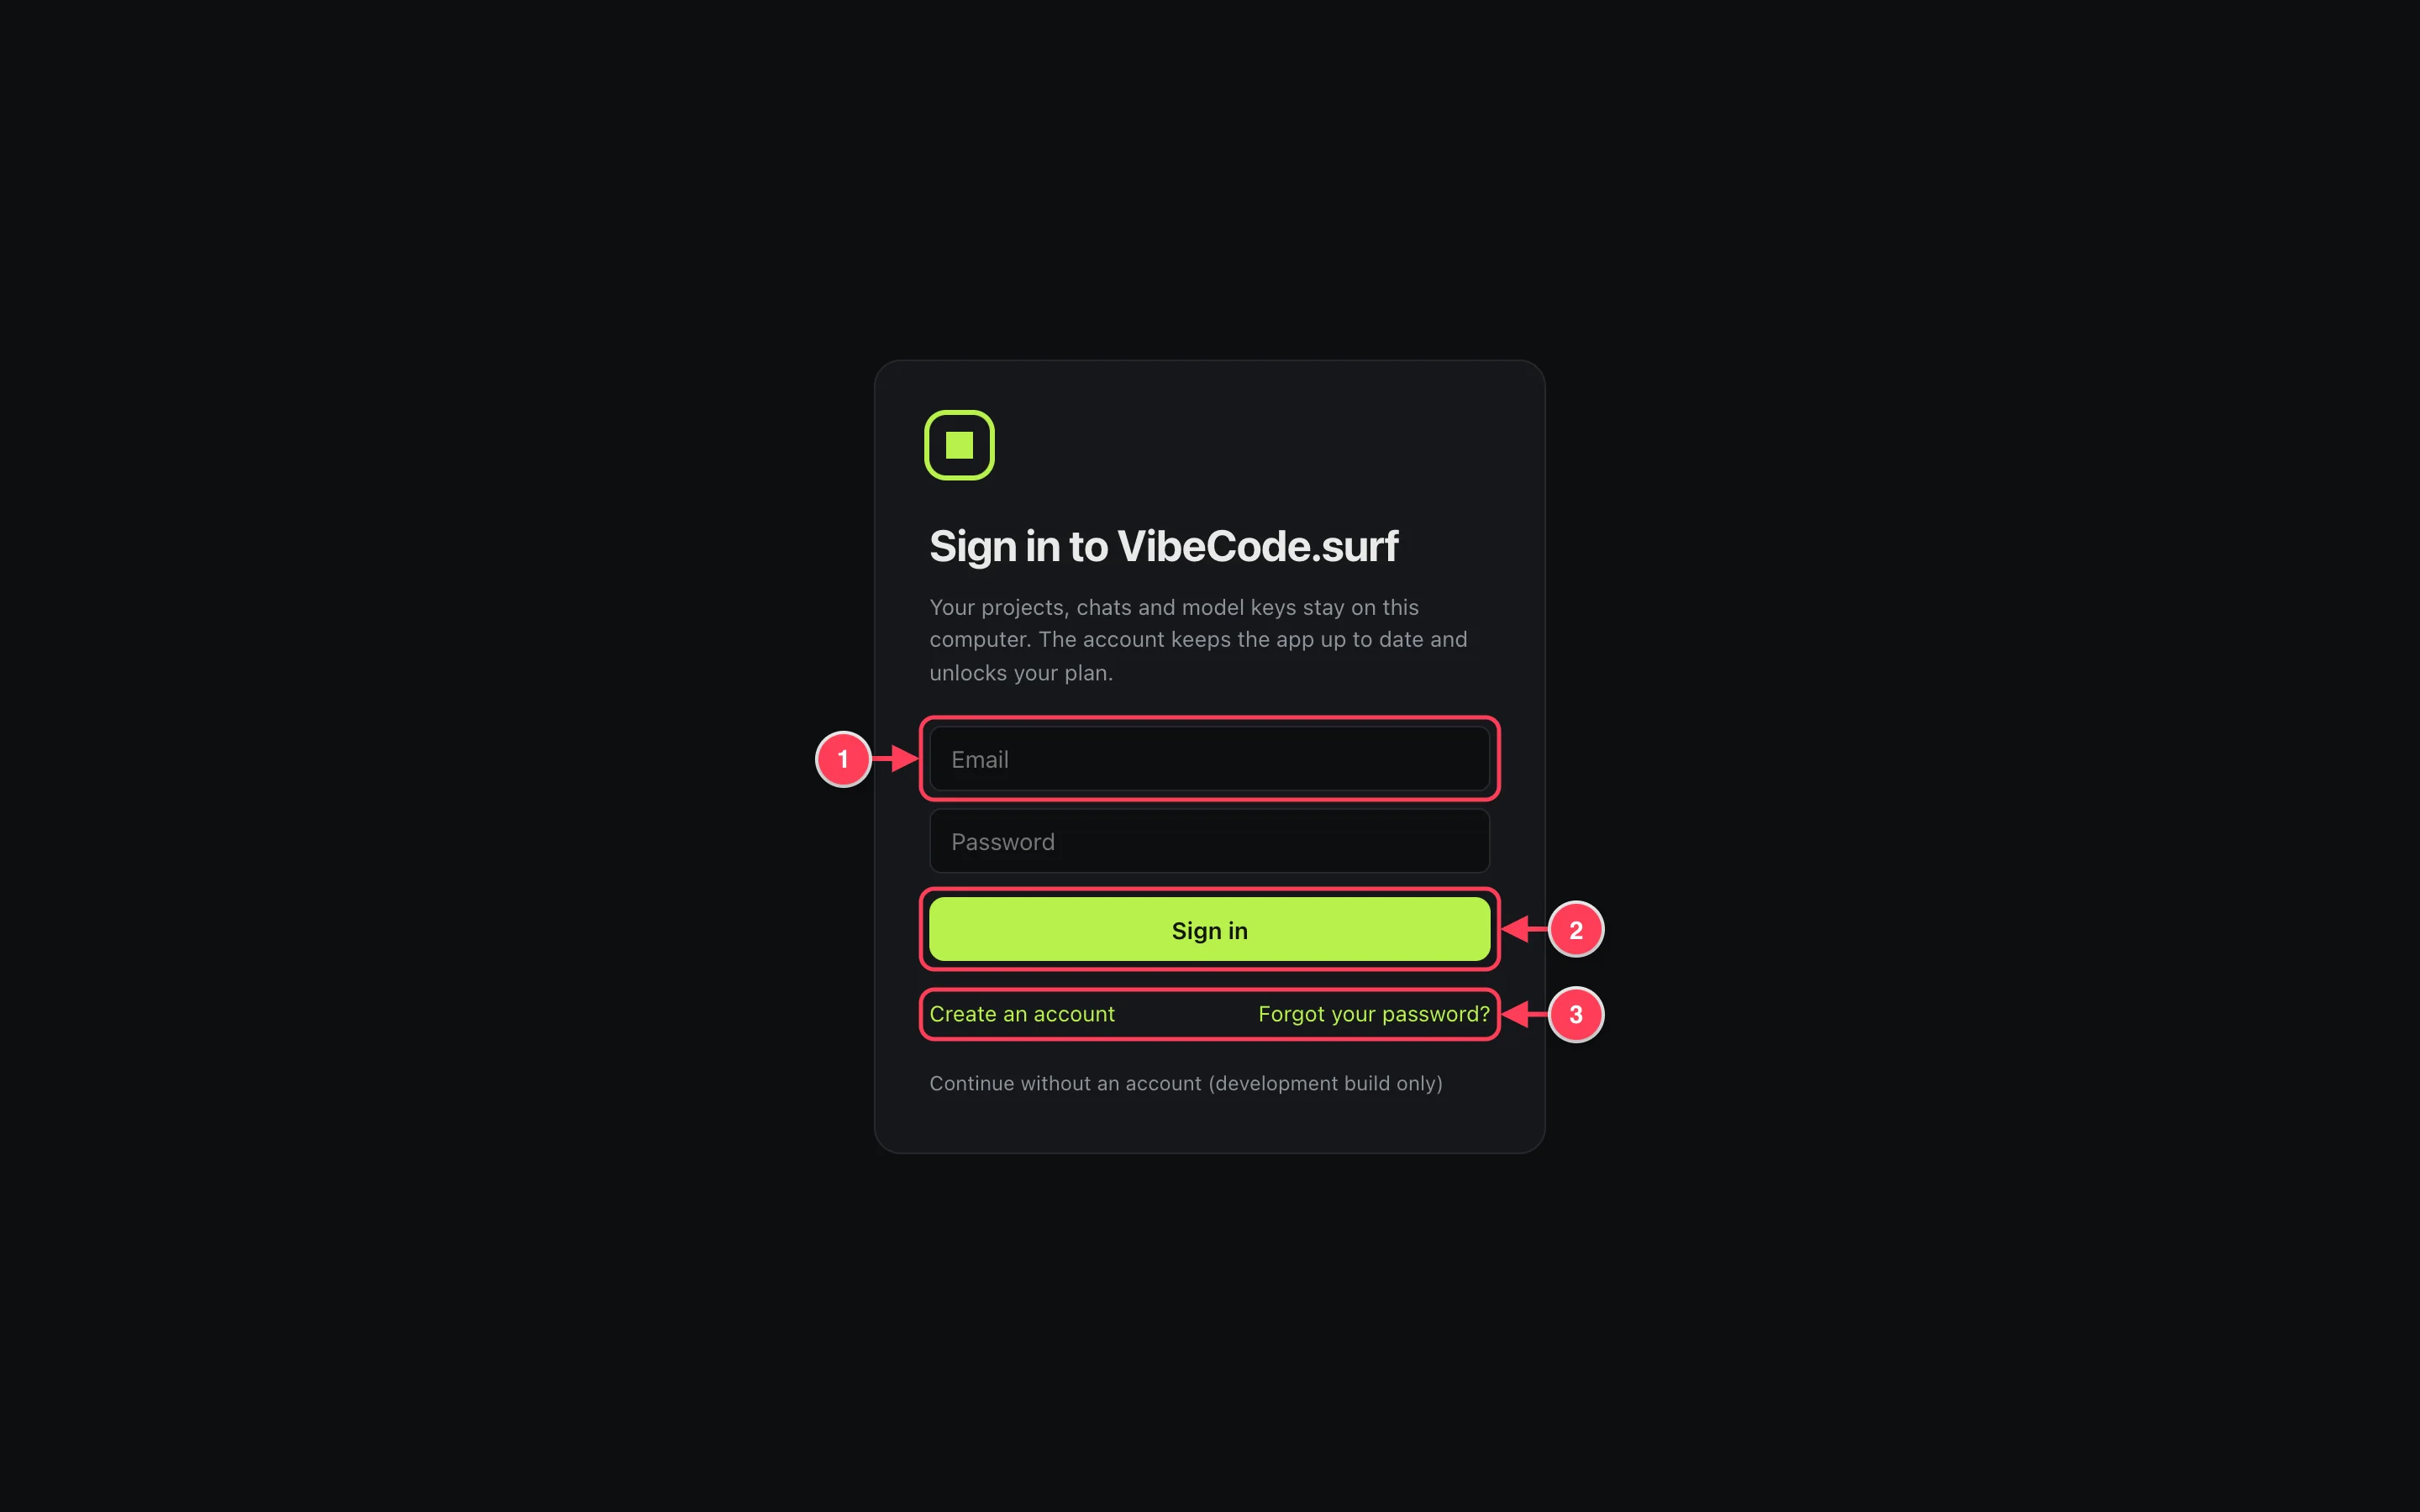
- Type the email and password of your account.
- Press Sign in.
- No account yet? Press Create an account. Forgot your password? sends a reset link.
Your projects, chats and API keys stay on your computer. The account only keeps the app up to date and unlocks your plan.
3. Connect a model
The app does not come with a model. You connect one: a hosted provider with an API key, or a local model that runs on your computer. The welcome screen shows a Connect a model card until you have done this.
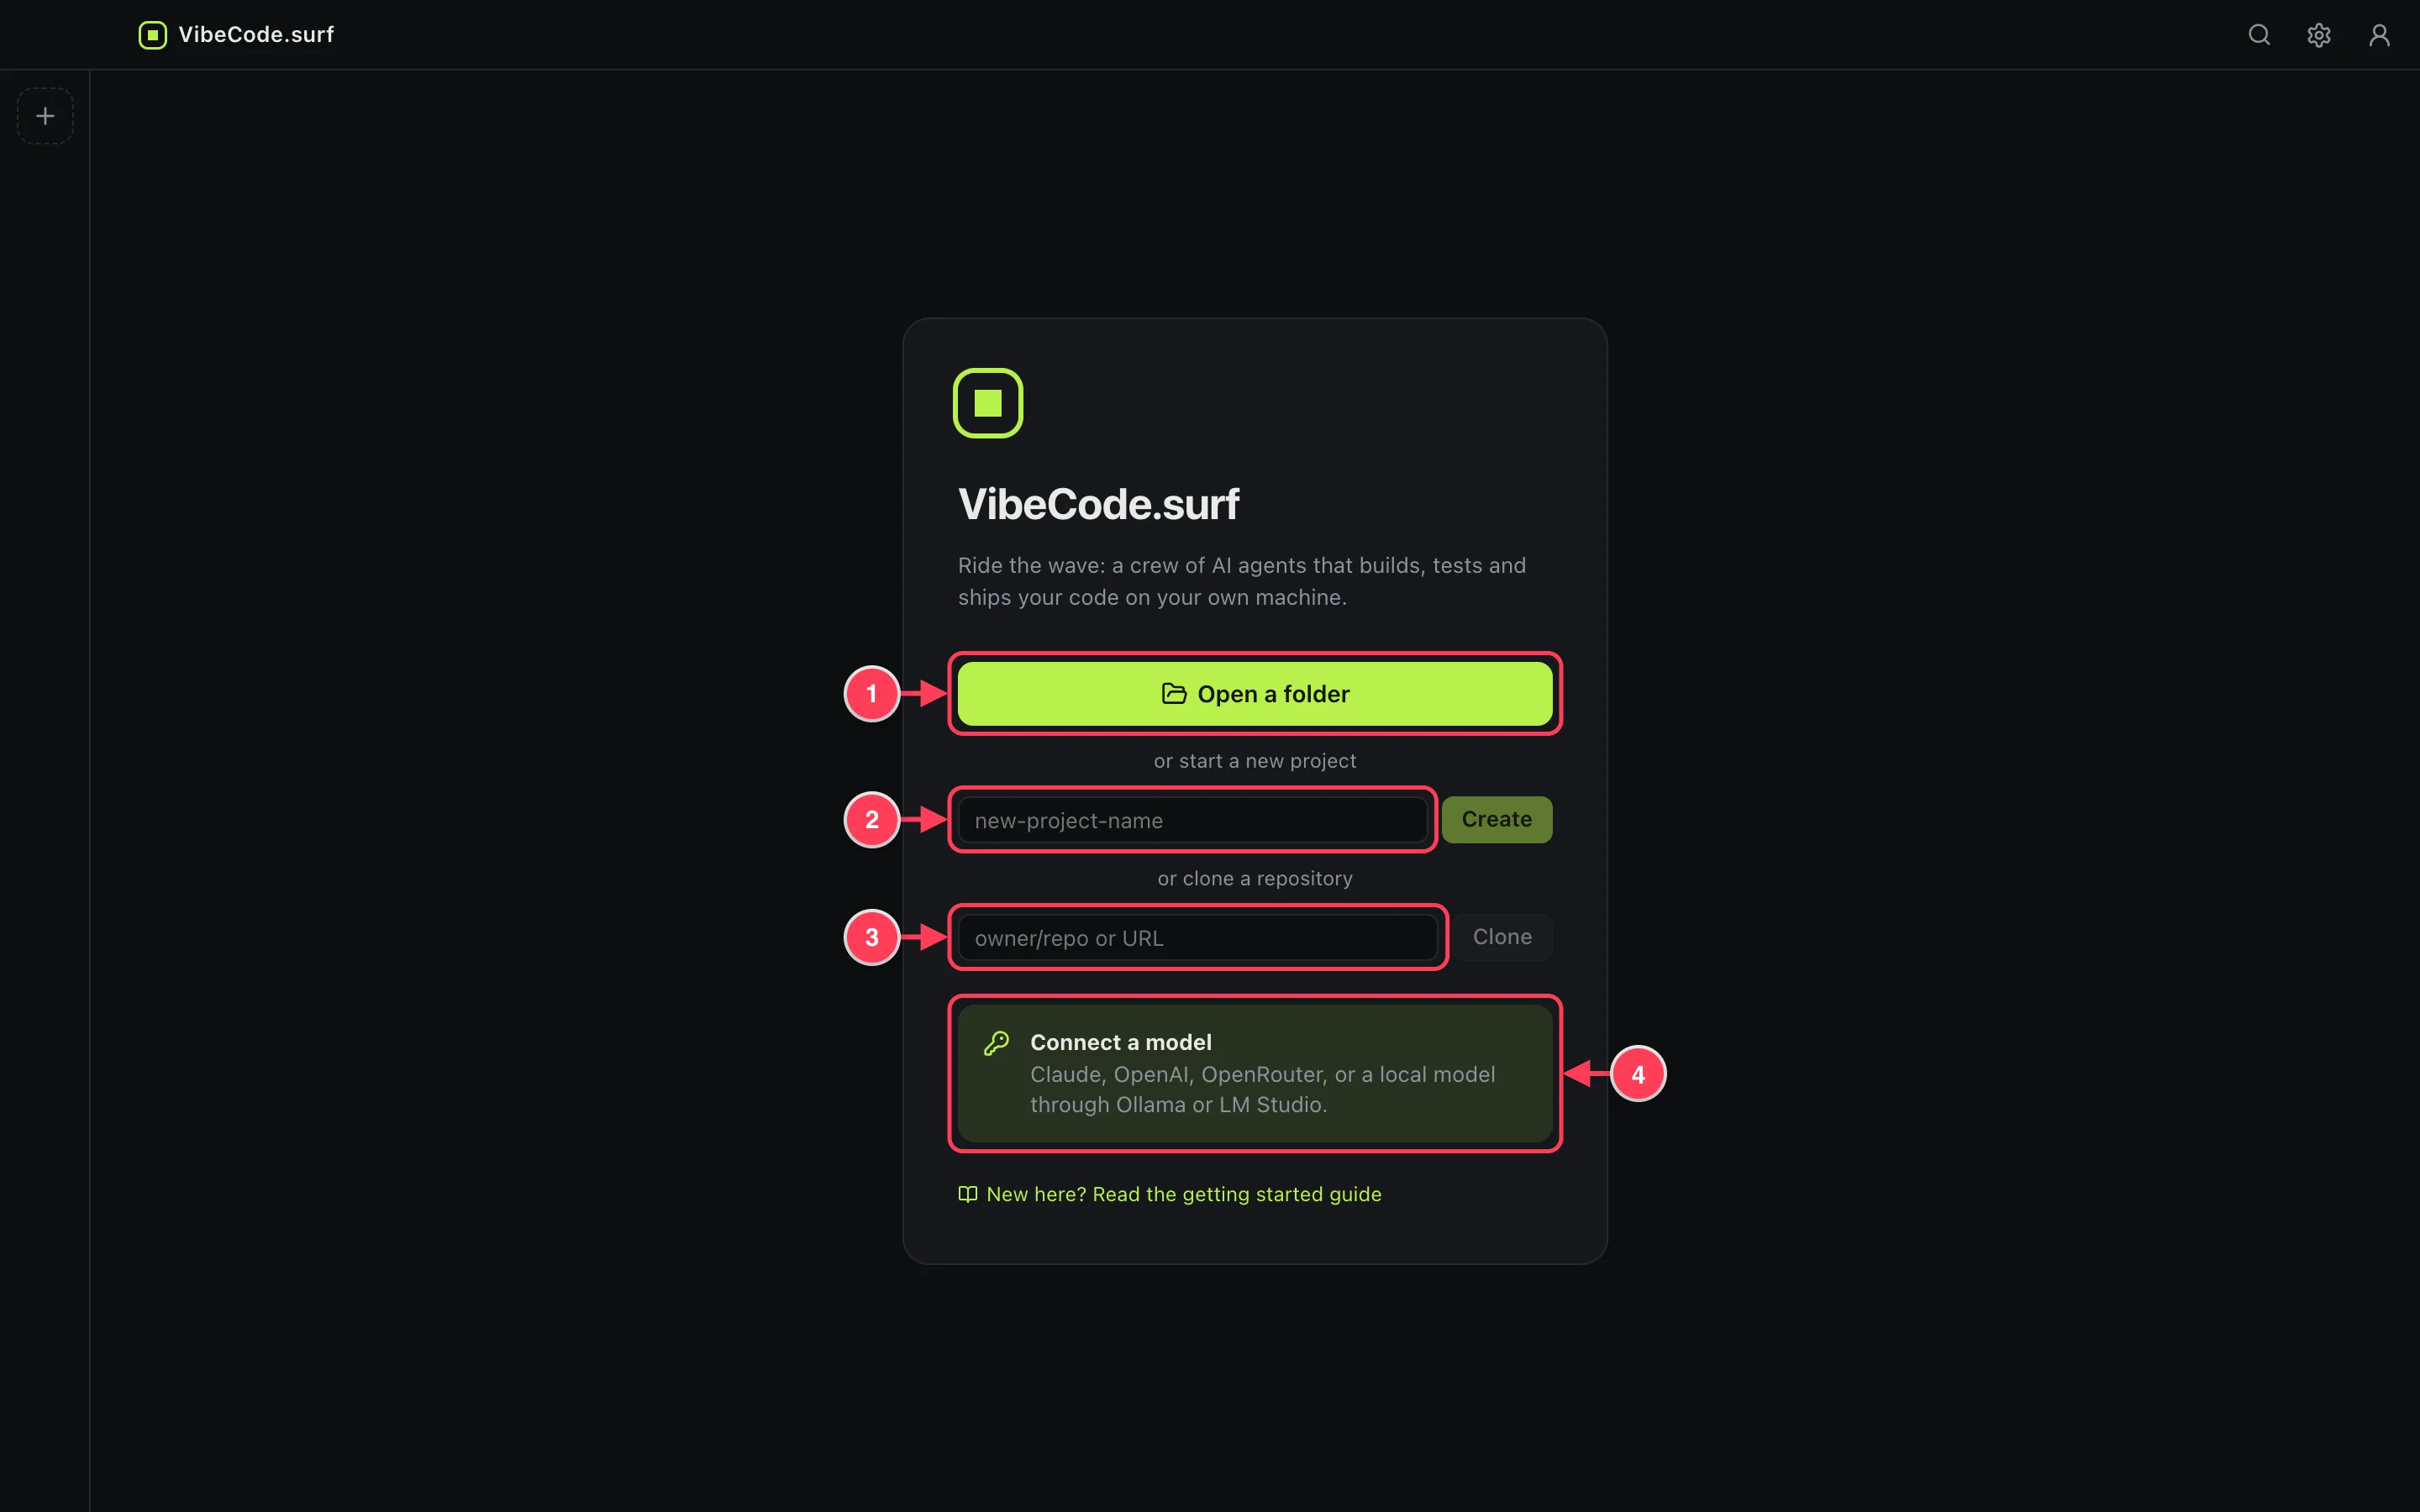
- Open a folder that already holds a project.
- Or type a name and press Create to start an empty project.
- Or paste a repository address and press Clone.
- Connect a model opens Settings.
The full steps, with links to where each provider hands out keys, are in Connect a model provider.
4. Open a project
A project is a folder on your computer. Agents can read and change files only inside that folder. Each project keeps its own agents, chats, plan and usage totals.
5. Find your way around
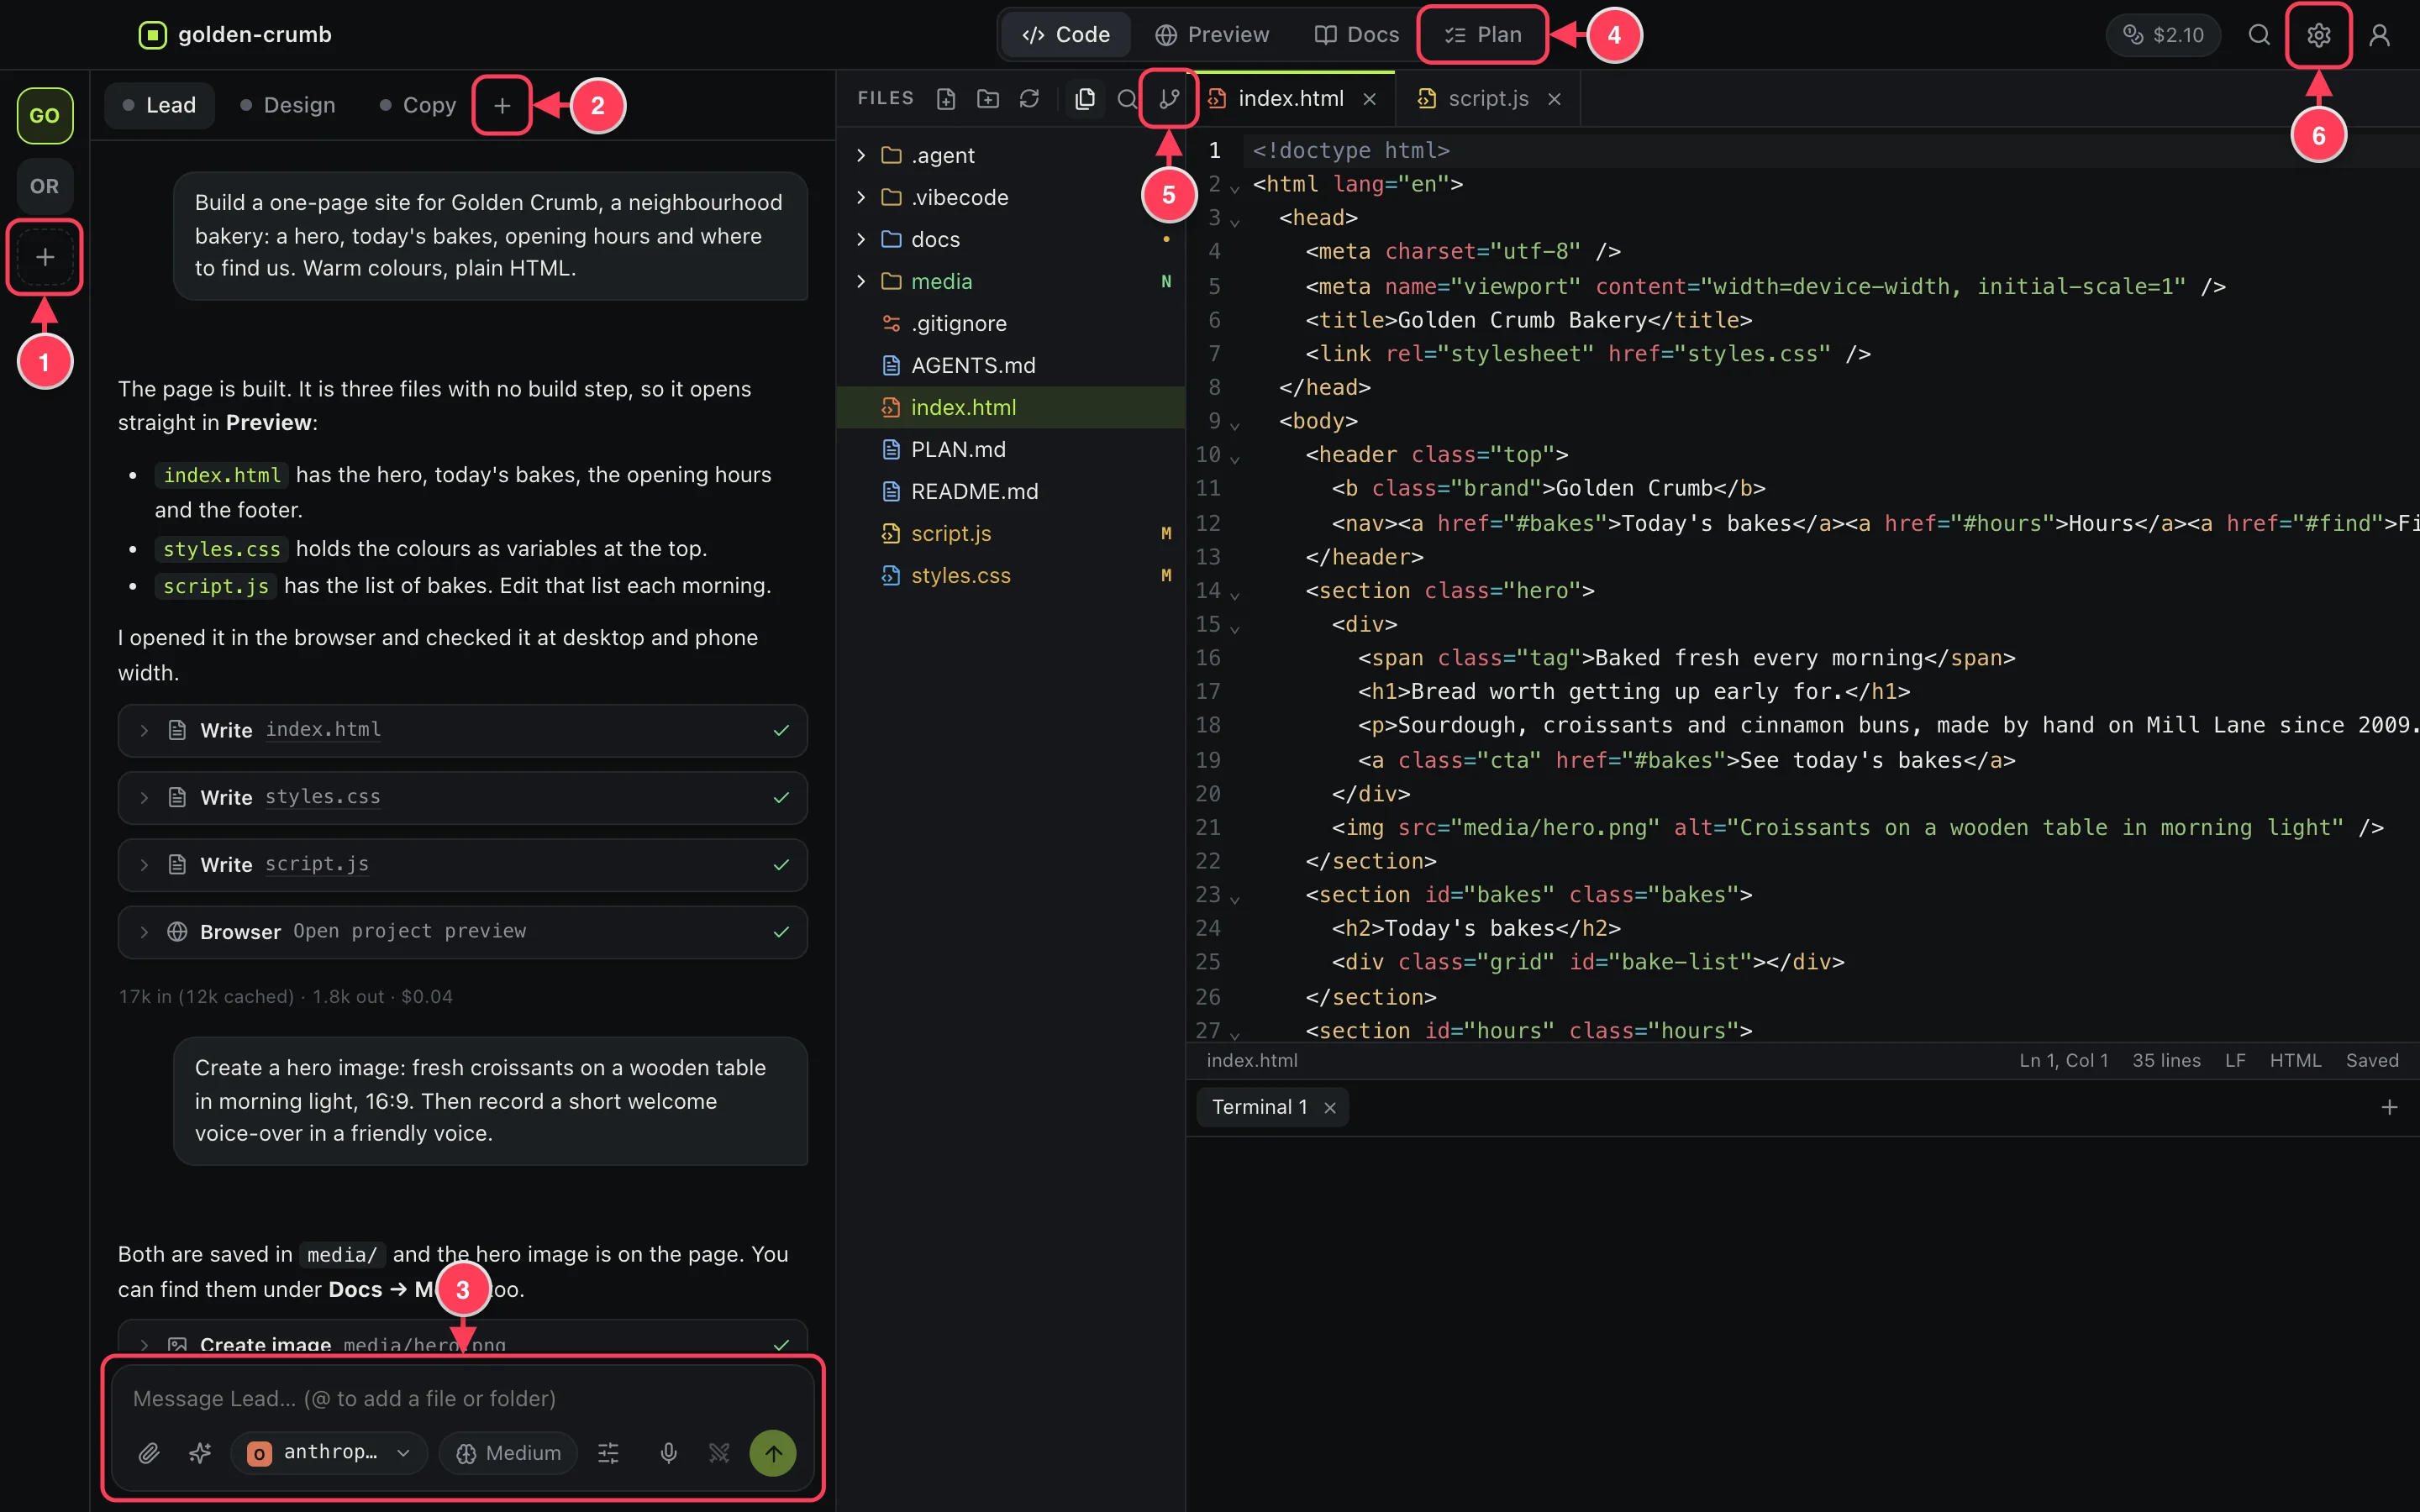
- The project bar. Each square is a project; + adds one.
- Agent tabs. Each tab is one agent with its own chat. + adds an agent.
- The message box. You type requests here.
- The four views: Code, Preview, Docs and Plan.
- The side panel switches between files, search, Git and history.
- Settings. To its left are search and the cost of this project; to its right, your account.
6. Send your first request
Click in the message box, describe the result you want, and press Enter. Describe the result, not the steps: what it does, who it is for, and how it should look.
Example requestBuild a one-page site for a neighbourhood bakery: a hero, today's bakes, opening hours and where to find us. Warm colours, plain HTML.
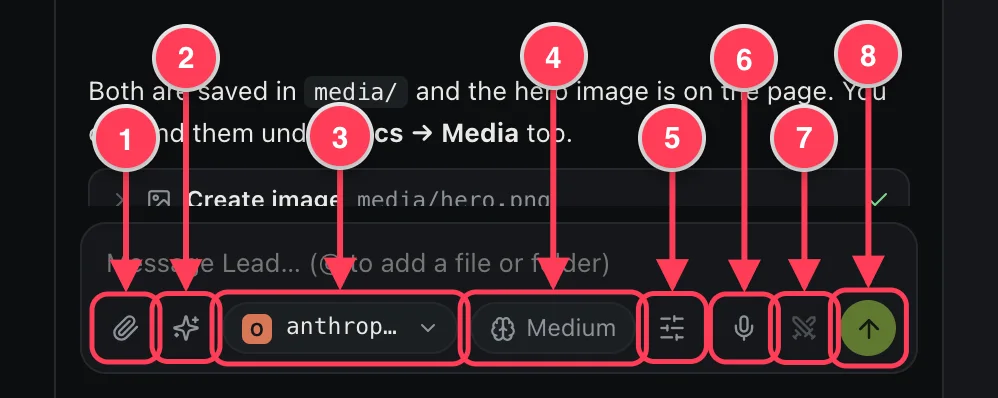
- Attach files. You can also drag files in or paste an image.
- Tasks: ready-made requests you can pick from.
- The model this agent uses.
- How hard the model thinks before it answers.
- Agent settings: name, role, condense, delete.
- Dictate a message with your microphone.
- Compare: run the request with two models.
- Send. While the agent works, this becomes Stop.
The agent shows each step as a card: the files it reads and writes and the commands it runs. Before it runs a command, it asks you.
Where to go next
- Run and preview your project: see what was built.
- Work with agents: more agents, roles, queueing.
- Undo and history: go back when a change is wrong.
- Work with GitHub: save your work online.